Social Apps - Apple
Posted on 2022-04-09Creating An Apple App
Note: You are new to join and get approved by Apple developers program before you can create an Apple app.
Note: There is a compulsory $99/year fee to join the Apple developer program. The reason why you must sign up from your apple developer app is that the approval takes less than 24 hours against signing up from your computer.
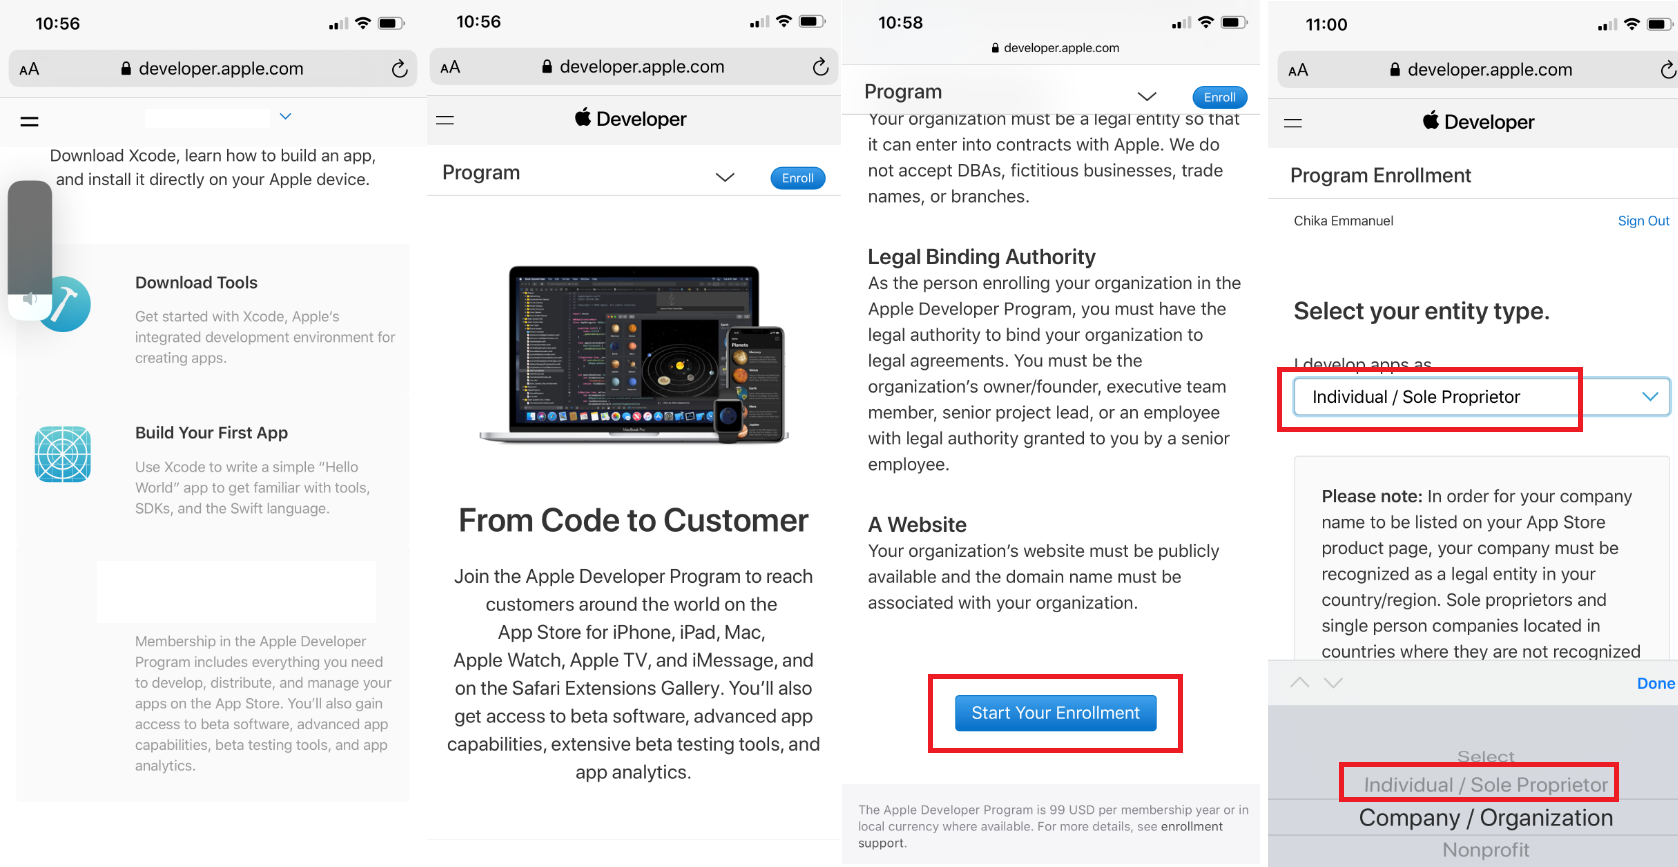
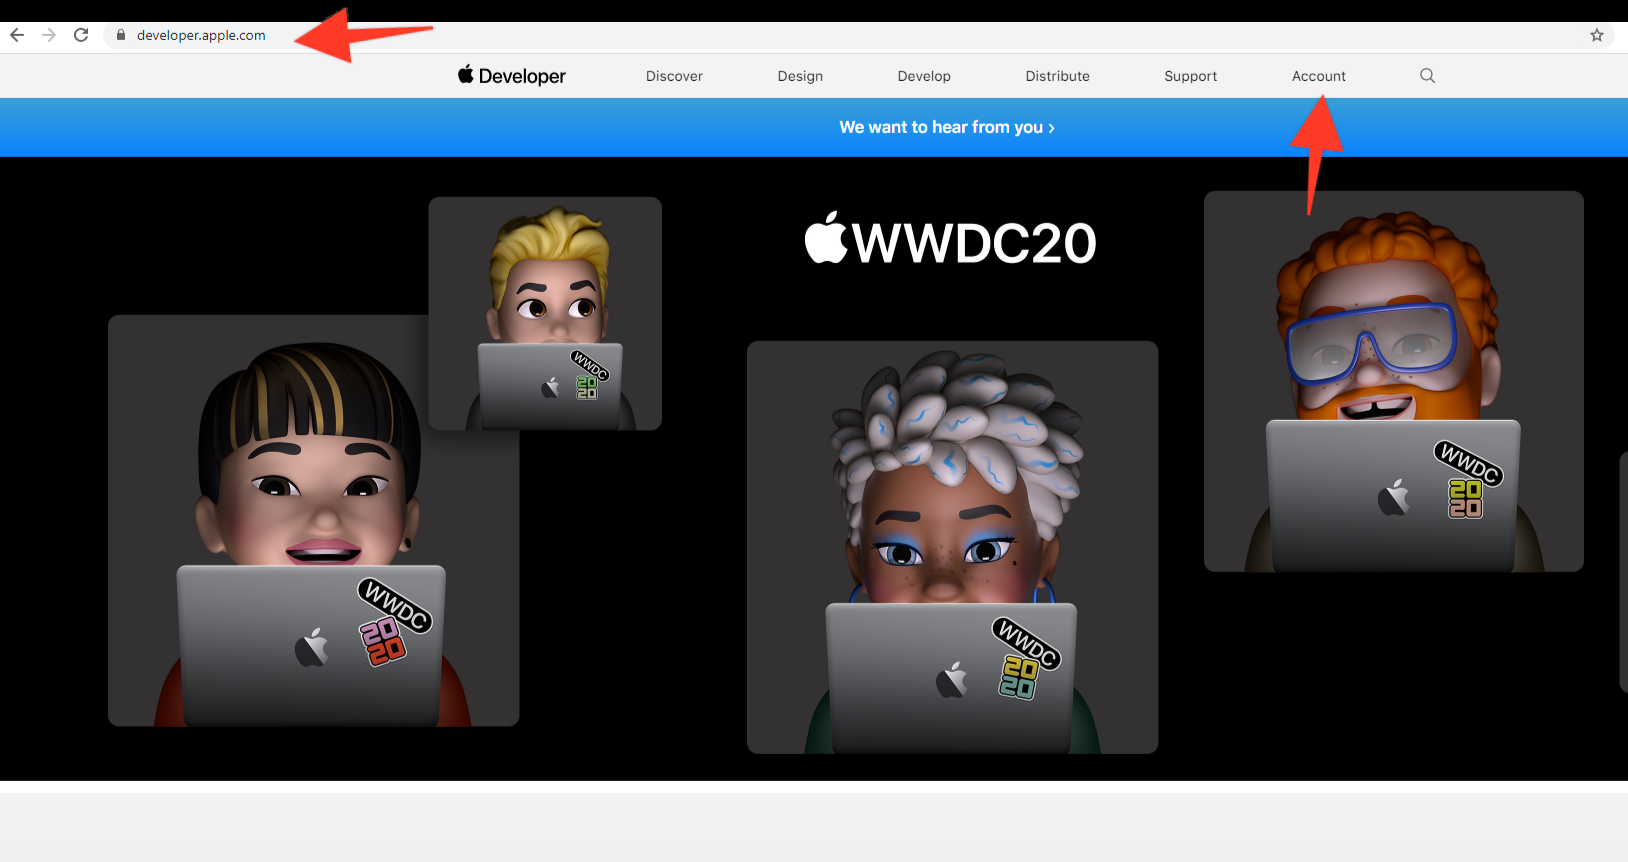
After signing up via the Apple mobile app, login here from your computer: https://developer.apple.com/
* Click on “Account” tab and login with your Apple credentials
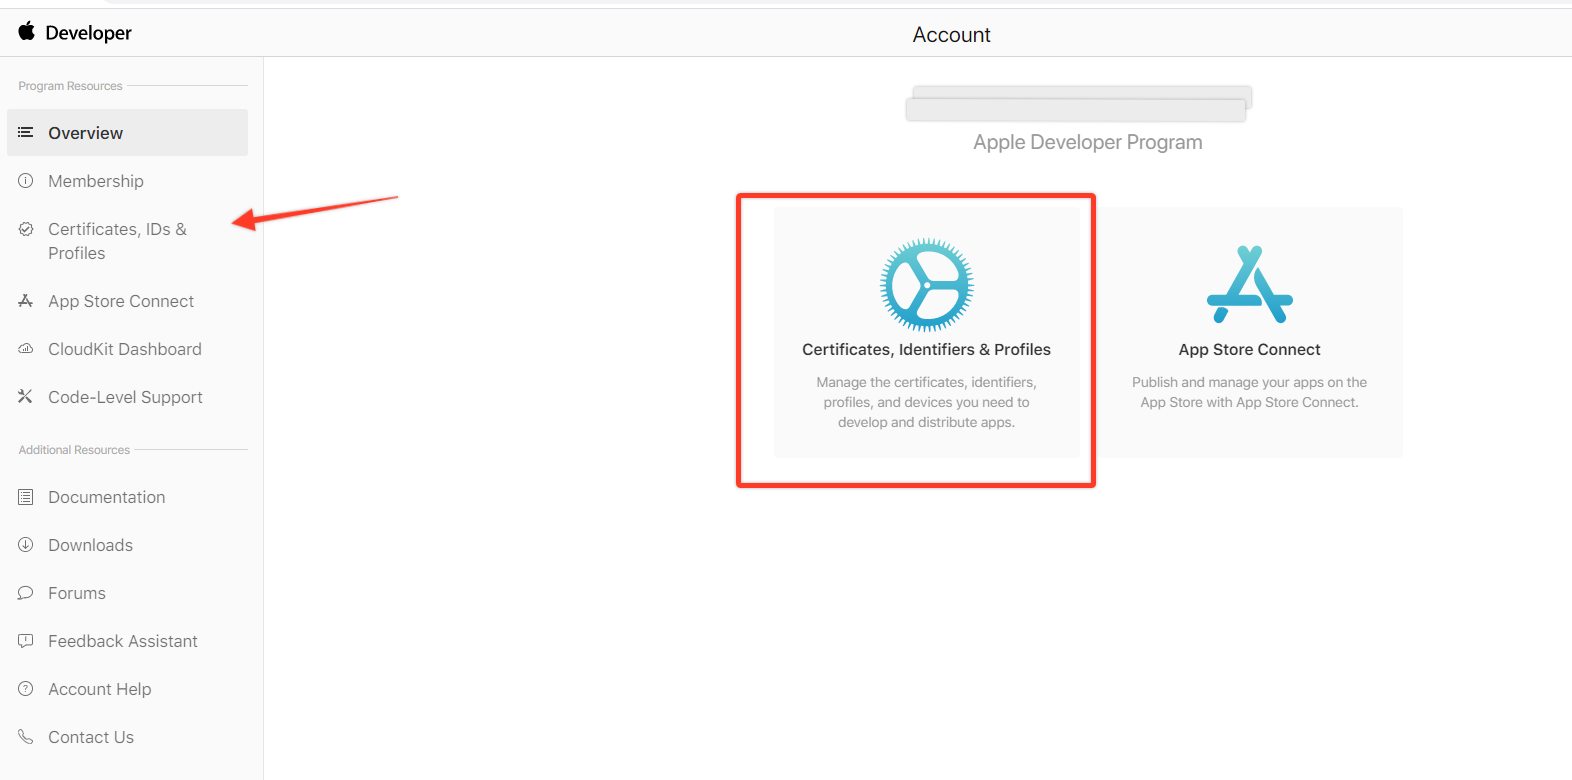
You can only see the below dashboard if you’ve been accepted as an Apple developer.
* Click on certificates, identifiers and profiles
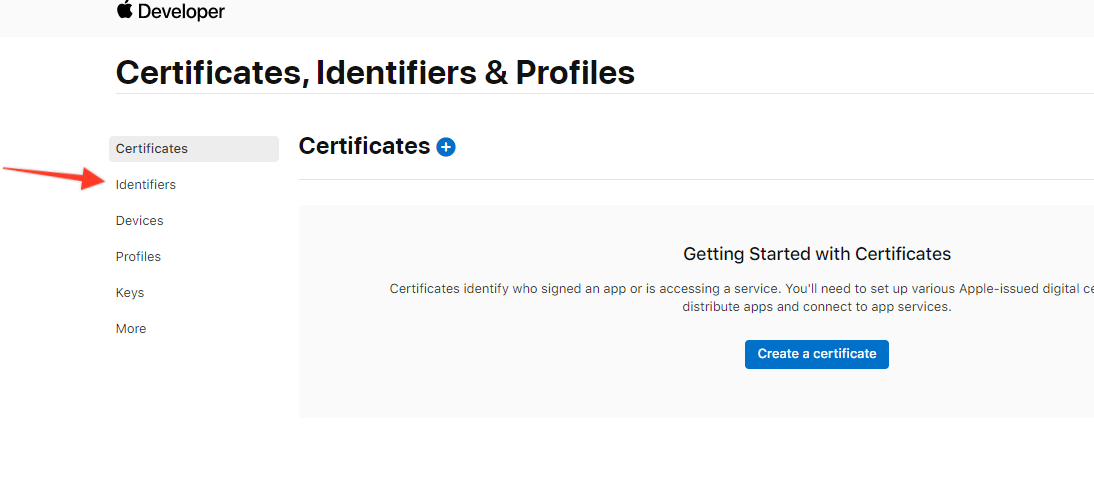
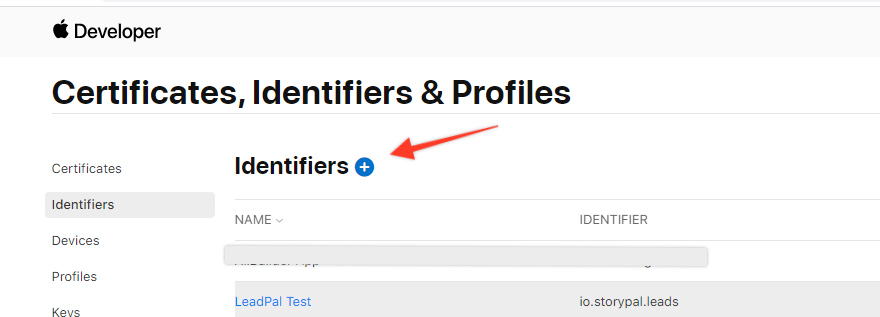
* Next, click on “Identifiers”
Click on the small “+” plus icon beside “Identifier”

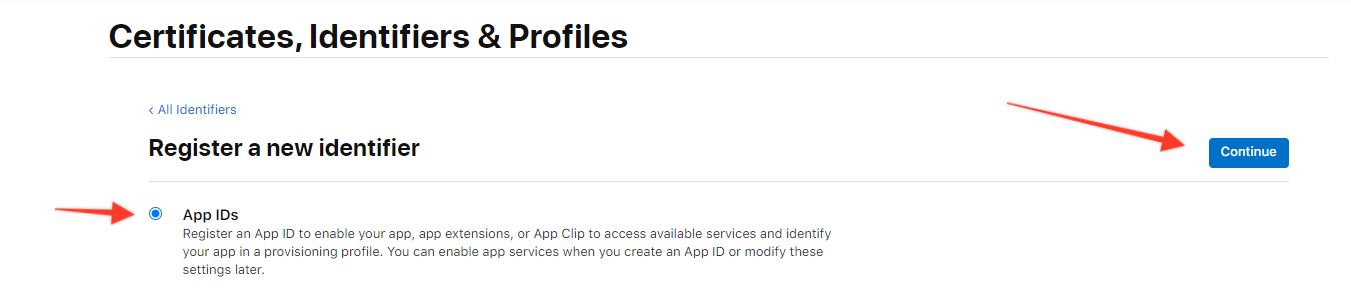
On the register a “New Identifier” page; check “App IDs” and click on “Continue” button
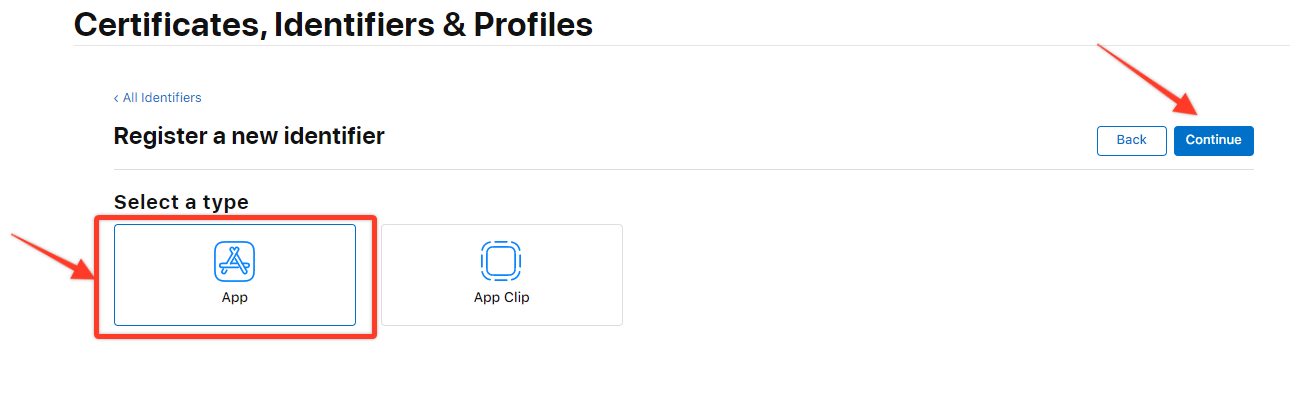
Registering you App ID
* Give your App a name
* Select “Explicit” as your Bundle ID
* Enter your custom domain on the reverse. Say your custom domain is leads.mywebsite.com, now it should be com.mywebsite, don’t include the subdirectory
* Scroll down, under capabilities, check “Sign in with Apple
* Click on “Enable as a primary App ID”
* Click to save
* Next click on continue button
* Click on “Register” to continue

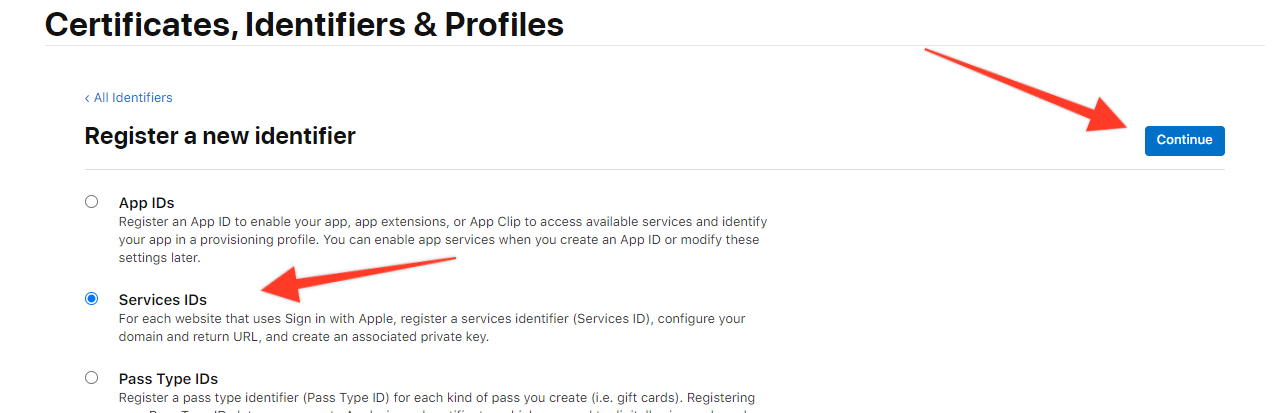
For the second time, click on the “+” icon beside the “Identifier” again
* This time select “Service IDs” from the register a new identifier option
* Click the ‘continue button
On your new “Service ID” dashboard, click on your URL to open a new window

Check “Sign in with App”, then click on “Configure”
* Select your “primary App ID” from the dropdown
* Enter your domains, this time not reversed, also do not include https or www. If you are adding more than 1 domains use the comma separator
* Enter your callback URL which should be https://yourcustomdomain.com/callback/apple for this test guide it will be https://leads.storypal.io/callback/apple
* After the configuration click to continue


Make sure to copy and save your “Client ID” and your “Theme ID” and click to continue

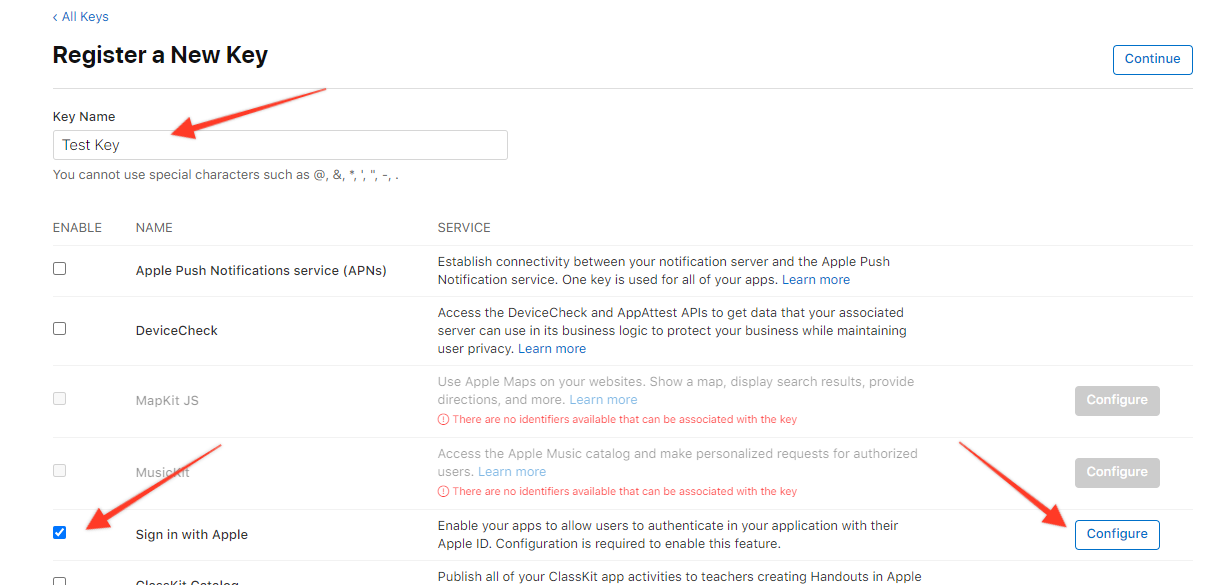
Click on “Keys” tab
* Click on the “+” plus icon beside “Keys”
* Register your new key by giving it a name
* Select ‘Sign in with Apple”
* Click on the “Configure” button
* Select your app from the “Primary App ID” dropdown
* Save your team ID and client ID
* Click on save
* Click on continue
* Click to register your key

* Download your auth key, you get to see it once.
* Also, save your “Key ID”

Copy your client secret to MoxiLead dashboard
While inside your MoxiLead dashboard;
* Under settings
* Click on Social Apps
* Click on “New Channel”
* Select “Apple” from the apps “Type’
* Paste your Client ID, Team ID, and Key ID”
* Upload the auth key path
* Locate your custom domain and save.
Found this article helpful?
[ 1 Out of 3 Found Helpful ]
